 |
 |
 |
 |
 |
 |
INTRODUCTION /OVERVIEW
Electricity is most often made by burning coal or natural gas. Both pollute the air. Wind and solar energy may be used in many ways including creating electricity. Wind and solar energy do not pollute the air. Power plants are now offering electricity made from wind energy for your home at a reduced cost.
Violent, destructive weather events are becoming more frequent. Homes may be lost to tornadoes; electricity may be off for days. Children need survival training before they are faced with coping with disaster. Much of this is being caused by CLIMATE CHANGE. Make survival training fun by using this experiment as part of a camping out project where fires are prohibited. That’s most of the American West during our prolonged drought.
Children learn by doing, and doing with their parents is the best kind. In this easy, inexpensive, fun, experiment, Mom, Dad, and the kids are invited to use their creative problem-solving skills to design and create 4 solar ovens.
To make it more interesting tie lunch to the experiment. Unless the BEST SOLAR OVEN gets hot enough to cook lunch, there will be no lunch.
Kids ages 5-95 will love this high interest solar experiment which will make a grand Science Project for school science fairs.
This is a great way to practice Kids Ecology as children learn survival skills.
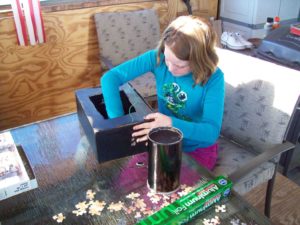
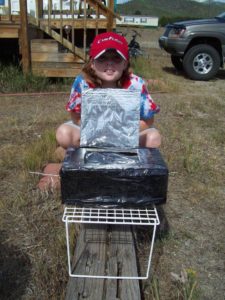
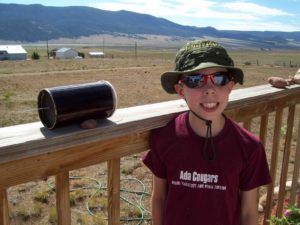
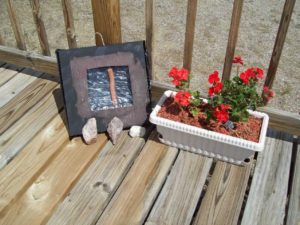
There are 2 Solar Energy Experiments. In EXPERIMENT 1. MAKE A SOLAR OVEN, you will see a family, vacationing in the mountains at a high altitude, having fun making different kinds of solar ovens and testing them. The adults had nothing to do with making the ovens. They only set out the materials! The adults also said there will be no lunch unless the kids can make a solar over which will get hot enough to cook lunch on!
This experiment may also be done at school, with a few changes. See below.
Although This experiment was done as a family, a teacher could remove the part about lunch, and have each of the cooperative learning groups make a different oven and test it. It is a great learning activity. The FOCUS of this experiment is not only to creatively design a solar oven, but also compete to see which one works best, and which one can heat water and heat up a snack. Encourage them to use Google for needed background.
In Experiment 2 – The FOCUS is on being able to change the “angle of reflection of the sun’s rays onto the aluminum foil, so the heat will move down to the bottom, where water, small objects, or food in the bottom of the oven will heat up.. In this experiment, all of the pizza boxes are made alike. However, unless they realize the earth is always moving in relation to the sun; and that means that every few minutes, the students must CHANGE the sun’s rays focused on the foil to keep the oven bottom heating, then it won’t. PLACE ONLY A FEW OBJECTS ON THE BOTTOM OVEN AT A TIME SO PLENTY OF BLACK SPACE IS OPEN TO CONTINUE TO HEAT UP.
BUILDING SOLAR OVENS: EXPERIMENT – 1 While at an altitude of 8,400 feet, with a temperature of 65 degrees F., and a steady small wind, the Kellogg kids created and tested the 4 solar ovens shown above. The best oven heated up to 180 degrees F. Take a look at the images above, and think about making a solar oven of your own. Which one do you think will heat up most?
SPICE CONNECTIONS: Variety & Similarity (4 different ovens), Interaction and Interdependence (sun, ovens, food), Change (Temperature) Under BOOKS on our home page you may choose to read Pink Hat’s Adventures with Seagulls, Hats, and Dancing Feet.
CHOOSE FROM SUPPLIES, WHAT YOU NEED FOR WHICHEVER EXPERIMENT YOU ARE DOING.
NEEDED SUPPLIES:
LARGE PIZZA BOXES OR OTHER, NOT VERY TALL BOXES, ROUND OATMEAL CONTAINERS, BOX KNIFE OR SCISSORS, HEAVY DUTY ALUMINUM FOIL CLEAR TAPE, RULER,THERMOMETERS, NEWSPAPER, BLACK SPRAY PAINT, OR BLACK PAINT AND SMALL BRUSHES, AND BRUSHES CLEANER, AND BLACK CONSTRUCTION PAPER, POT HOLDERS, SMALL CLEAR OR BLACK SMALL CONTAINERS (20 or 30 ml), FREE AT PIZZA HUT (BOXES AND the little, containers. (CONTAINERS HOLD JUST ENOUGH WATER TO HOLD THERMOMETER, a few eggs. paper and pencils for keeping a record. (You may not use all of these materials, you may substitute other materials).
Some of the materials listed may be used in BOTH EXPERIMENT – 1 AND IN EXPERIMENT – 2
EXPERIMENT – 1
PROCEDURE: Study the pictures of the Kellogg’s solar ovens above. Notice how they are alike and how they are different. Caution: These ovens get really hot and so does the food. Use a pot holder to protect your hands.
PROBLEM – Which oven will get and hold heat best?__________________
HYPOTHESIS: My best solar oven will reach, and hold _______________ degrees of heat.
PROCEDURE: Google some research, gather materials, create and test the solar ovens. Keep track of results as you go with pen and paper.
RESULT – State your hypothesis was (true) – (false). I was, was not, able to cook lunch in my solar oven.
P.S. Even though the Kellogg family was in the high mountains, with cool temperature, with some clouds coming and going, and with a breeze, they were able to cook hot dogs, thinly sliced potatoes, brushed with a little oil, and S’mores for the family. That with cold carrots made a great lunch! Their best oven reached 180 degrees F. They put the hot dogs on a (SAFE TO EAT) BIT OF GREEN WAXY LEAF FOR EACH.The leaf was just big enough for the hot dog to sit on. so they would not be messy. If you live where it is really hot in summer, your oven will get hotter. Which of the four solar ovens shown above, do you think had the highest temperature? _________
When you have made your best solar oven, experiment with cooking some other foods such as cheese toast, an egg, cookies. Remember it takes longer for the sun to cook food, and the best time is on a clear day between 11:00 A.M. and 3:00 P.M. Have fun and surprise your mother!
EXPERIMENT – 2 ALL SOLAR OVENS ARE THE SAME, MADE FROM LARGE PIZZA HUT BOXES.
1 . I strongly suggest that the teacher use black spray paint outside to make the pizza boxes black all over. They should be allowed to completely dry before you continue. Have your students use the same scientific method under the Procedure in Experiment 1.
2. Help students cut the foil to fit, then attach the heavy duty foil inside the top of the pizza box. It may be attached by pieces of tape being rolled on the back of the foil, then place it on the pizza box top. Or you may choose to use glue.
3. Move out into full sun and stay in full sun until the experiment is finished. My students set their ovens on top of a stack of newspapers for insulation and to keep it off the ground.
4. Cover the bottom of the pizza box with black construction paper and attach it.
5. Whenever you test, water, or an egg or other food snacks, place it on a little piece of waxy green leaf from a safe to eat plant, so it does not mess up the const. paper. Or, you could cut a , just to fit, bit of cardboard and place the objects on it. With the egg, a leaf large enough to hold the cooked egg is a good ides, or put it in a small dark colored dish.
6. Ask your students if they think their ovens could cook an egg? How many yes ______ no ____? Have a few small snacks, such as tiny bits of cookie dough, S’mores, or other things to heat up.
7. Use the thermometer to see how hot the water will get in how much time. ________________
8. Place 2 or 3 leaves on the solar oven bottoms and see how long it takes them to shrivel up. _____
9. Allow time for experimenting and fun as your students experiment. IT MAY BE SEVERAL DAYS BEFORE YOU GET THEM ALL DONE, so protect the oven bottoms and keep them clean or replace the black construction paper each time.
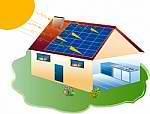
It would be good to visit a house with solar panels, and learn how the heat of the sun is turned into electricity for use in the home. Google if you can’t for same information.
REDUCE – REUSE – RECYCLE
 |
 |