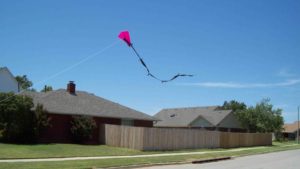

Exciting kiting!
INTRODUCTION/OVERVIEW
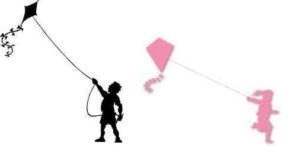
Kids create, decorate, and name their aerodynamic, kid-friendly, little kites. As they fly the easy to make, easy to fly kites, they learn how to work with the wind for hours of kiting fun.The next webpage Kite Experiments offers many activities and experiments which helps kids build creative problem-solving skills as they do aerodynamic designs and physics.
Adventure loving kids ages 5-12 and even high school kids get excited about how our amazing Planet Earth works! Since the little kite is a starting place for a lot of science, some high school physics teachers are using it as budget constraints require creativity.
This is the first step in understanding the power of the wind. It would be a good thing to take the kids to see a wind turbine, and then google to see how the power of the wind is used to generate electricity. This is an alternative, non-polluting source of energy.
MATERIALS – 8 1/2 x 11 paper ( 24 lb. paper works best but other weights will do), magic markers (to decorate kite), tape (scotch or masking) soda straws, scissors, hole puncher (optional), 1 inch by 2 inch piece of cardboard or craft sticks or any smooth stick (to wind the string on), ruler, string or thread (soft, smooth crochet thread works well), plastic (for tail, plastic which is a little thicker such as leaf bags works best), large paper clips, and small rubber bands (clips and bands help hold the string and tail to keep it off the floor until outside.
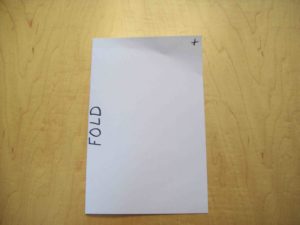
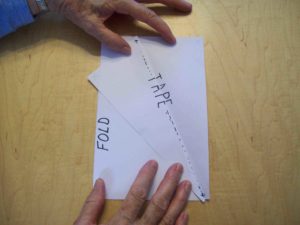
1 . Fold paper in half (horizontally), write the word FOLD on the fold line, and place x’s in the upper right-hand corner (3 x’s possible).
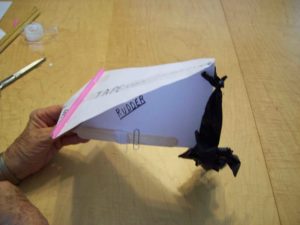
2 . Bring the right corner diagonally across the FOLD line about one inch at the top and less all the rest. (See image) It looks like you are making wings on a paper airplane.
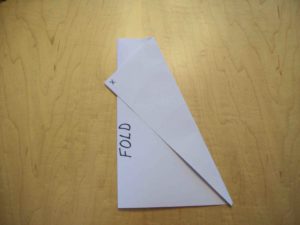
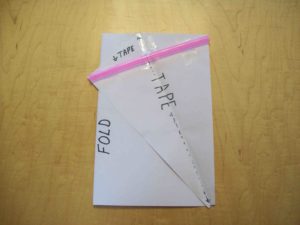
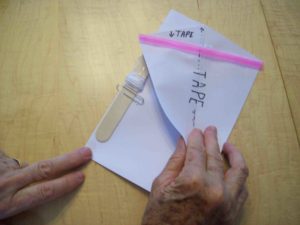
3 . Press edges down firmly. Open it up and there you see the wings of the kite. Write the word TAPE along the middle of the wings and tape them together, top to bottom, to make a fixed wing.
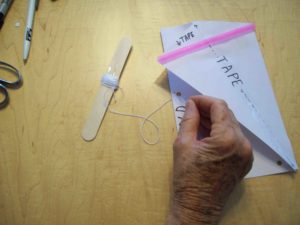
4 . Tape the soda straw across the top of the kite at the widest part. Tape it horizontally at both ends and, in the middle, then trim the straw to fit. If the straw has a bend in it, tape over the bend to make it stronger.
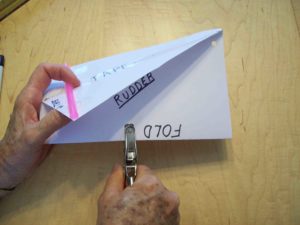
5 . The narrow end of the kite, at the bottom, is where the tail will go. Punch a hole, about 1/2 inch from the edge of the paper for the plastic tail to be attached. 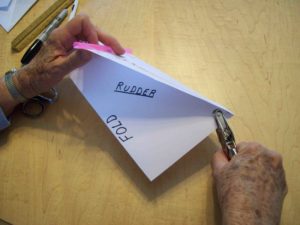
6 . Measure about 1/3 of the way down from the top of the kite along the FOLD line, move in about 1/2 inch and punch a hole for the string. The big part of the kite where the string and tail go is called the RUDDER. Write the word RUDDER on the big part.
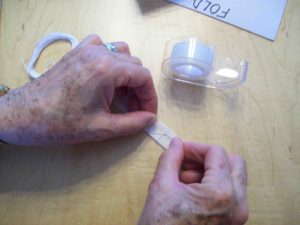
7 . Measure 10 feet of string. Tie it on the string holder and tape it down. Wind the string around the string holder leaving enough to tie onto the kite RUDDER. Attach a paper clip to the string holder and the kite to secure it until you are ready to fly it. ALWAYS STRAIGHTEN THE RUDDER AND WINGS BEFORE FLYING THE KITE SO IT WILL FLY STRAIGHT.
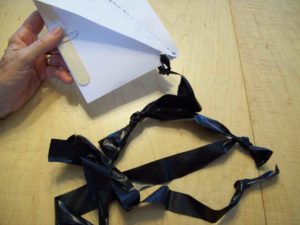
8 . Cut 10 feet of plastic about 1 1/2 inches wide. Tie strips of plastic together with loose knots. Make sure there is a knot in the tail about every 18 inches. These knots keep the tail from twisting into a string while in flight. The tail and the rudder control the kite. Tie the end of the tail loosely onto the end of the kite. Secure it with a rubber band until you are outside ready to fly
9 . Name your kite, decorate it, straighten the rudder and wing. Find a big wind, release your kite into the big wind and have FUN learning to fly your kite. When finished, secure the string and the tail with the paper clip and the rubber band and it will be ready to fly again and again!